SAFETY DISCLAIMER (READ FIRST!)
This modification is for educational purposes only. You are fully responsible for any actions taken. Using a rear-view camera while driving at high speed may be illegal in your jurisdiction and is inherently distracting. Please proceed entirely at your own risk.
Have you ever wished you could activate your car's rear-view camera without putting the transmission into Reverse? Whether you need to constantly monitor a trailer you are towing or simply want an easier time parking in your tight garage, this simple electrical modification can help.
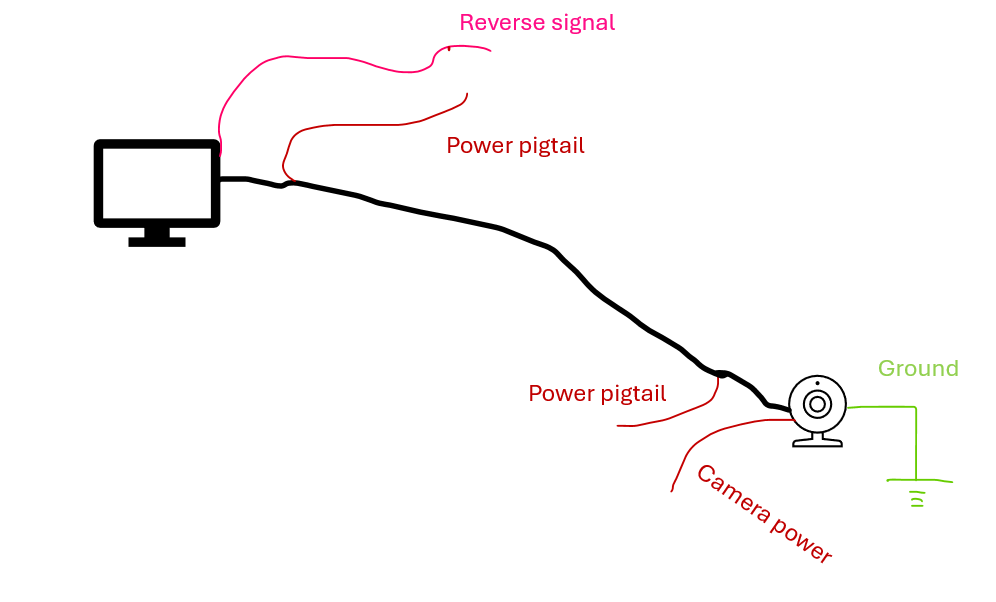
A. Wiring of a Typical Aftermarket Head Unit
First, let's look at the baseline. A typical setup involves a grounded camera that needs power to activate and a signal wire (RCA) connecting the camera to the head unit. Most signal wires include a red 'pigtail' wire on each end, allowing power to travel from the back of the car to the front alongside the video signal.
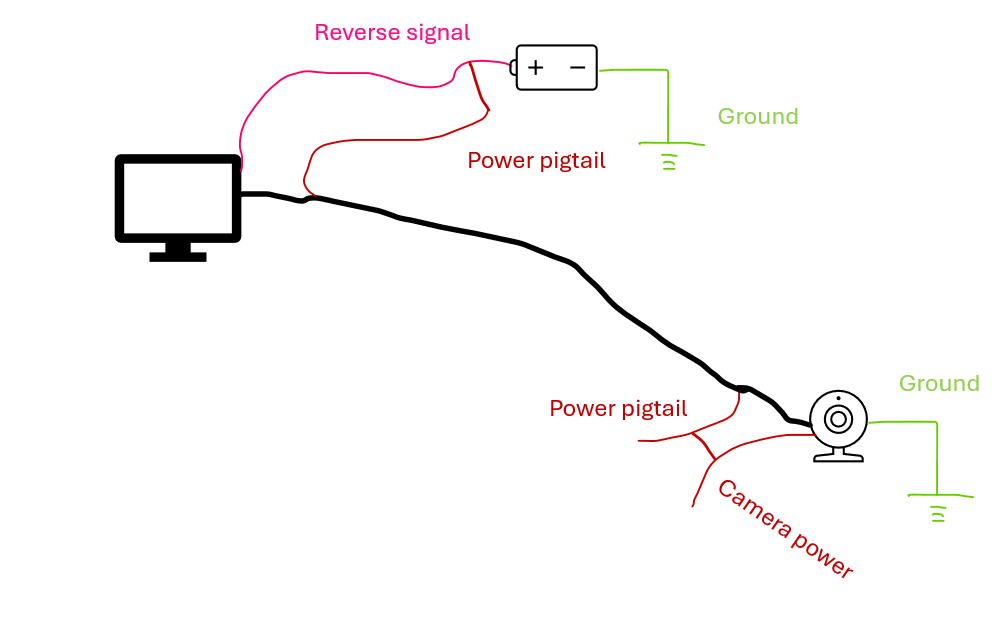
B. The Logic: How to Trigger the System
To see the camera on your screen, two things must happen: the head unit needs a 12V signal to 'wake up' the display, and the camera needs 12V to start broadcasting. By connecting the pigtails to the reverse signal wire and powering it with a 12V battery, 12V travels the length of the car to power both ends simultaneously and the system is activated.
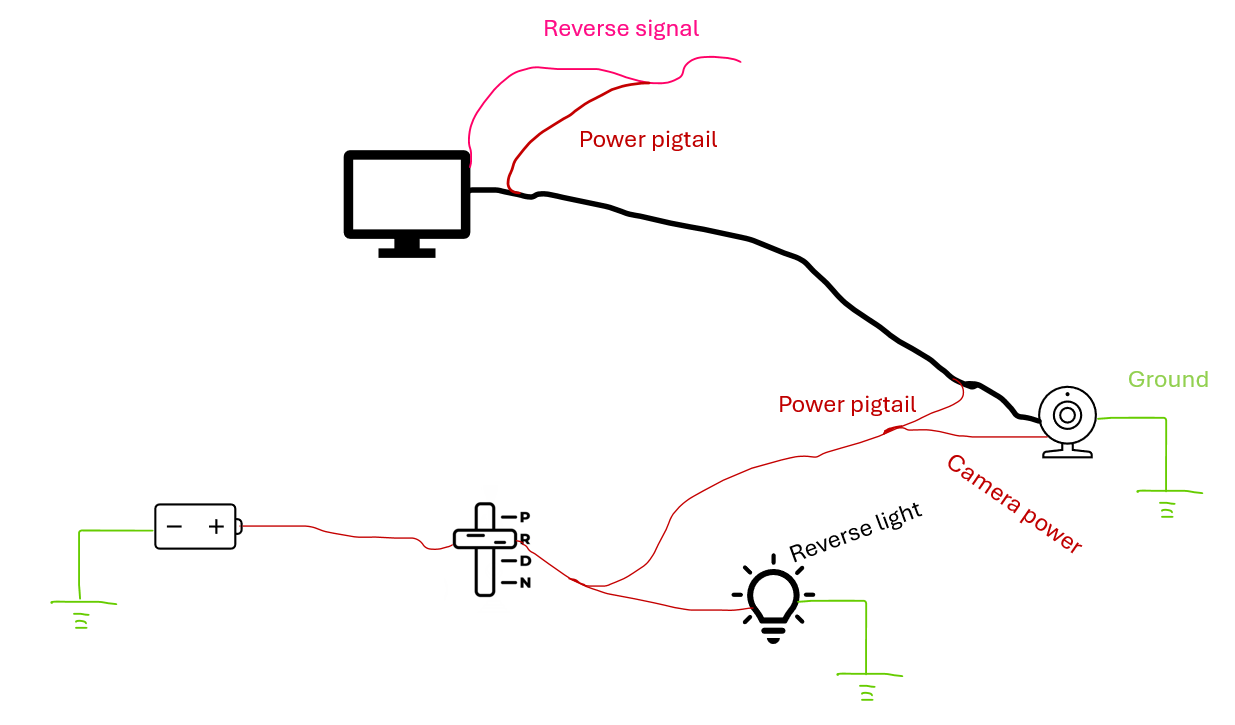
C. The Standard Setup: Using the Reverse Light
In a standard installation, we get our power from the reverse light circuit. When the gear selector is shifted into 'R', the reverse light receives 12V. That power taps into our pigtail/camera line, informing the head unit and activating the camera at the same time.
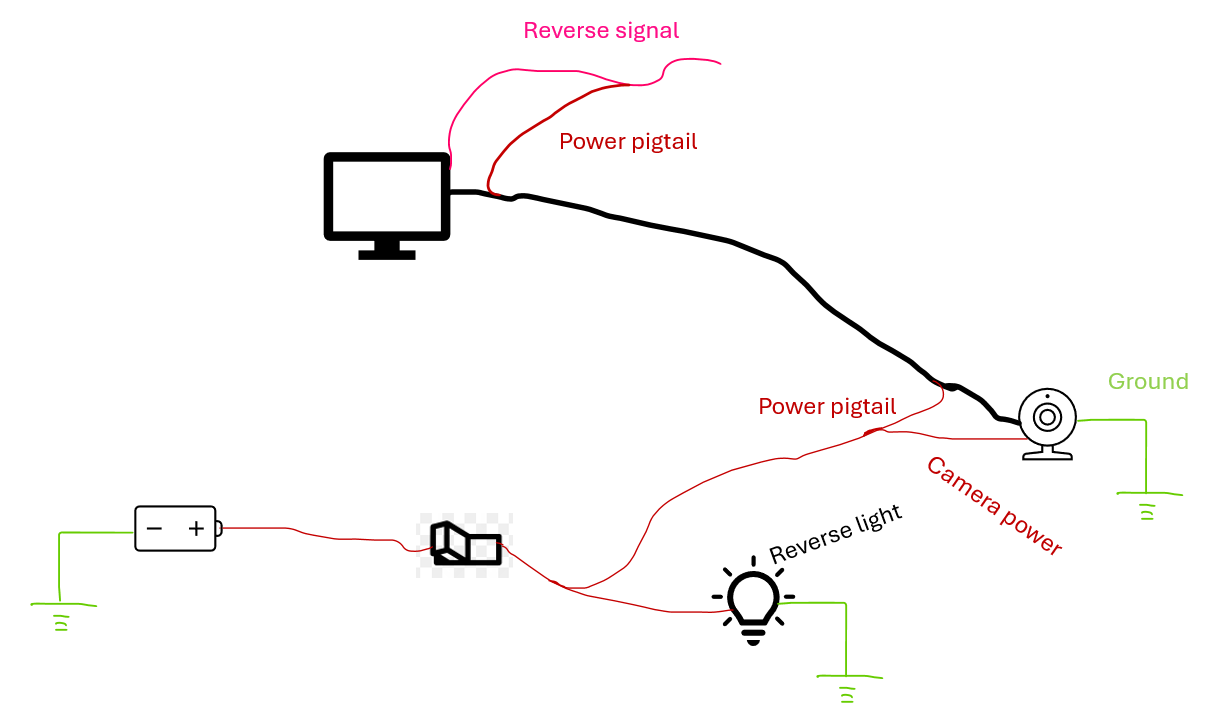
D. The Manual Override: Adding a Switch
If we want to activate the camera manually, we can replace the gear selector logic with a simple toggle switch. This allows us to 'fake' the reverse signal whenever we want.
E. Combining Both Systems (The Logic Flaw)
We can combine the two sources as shown below. The switch gets power from a constant or accessory source (the head unit's unused 'antenna amplifier' wire is often a convenient 12V source). Now, the camera activates either when you shift to 'R' OR when you flip the switch.
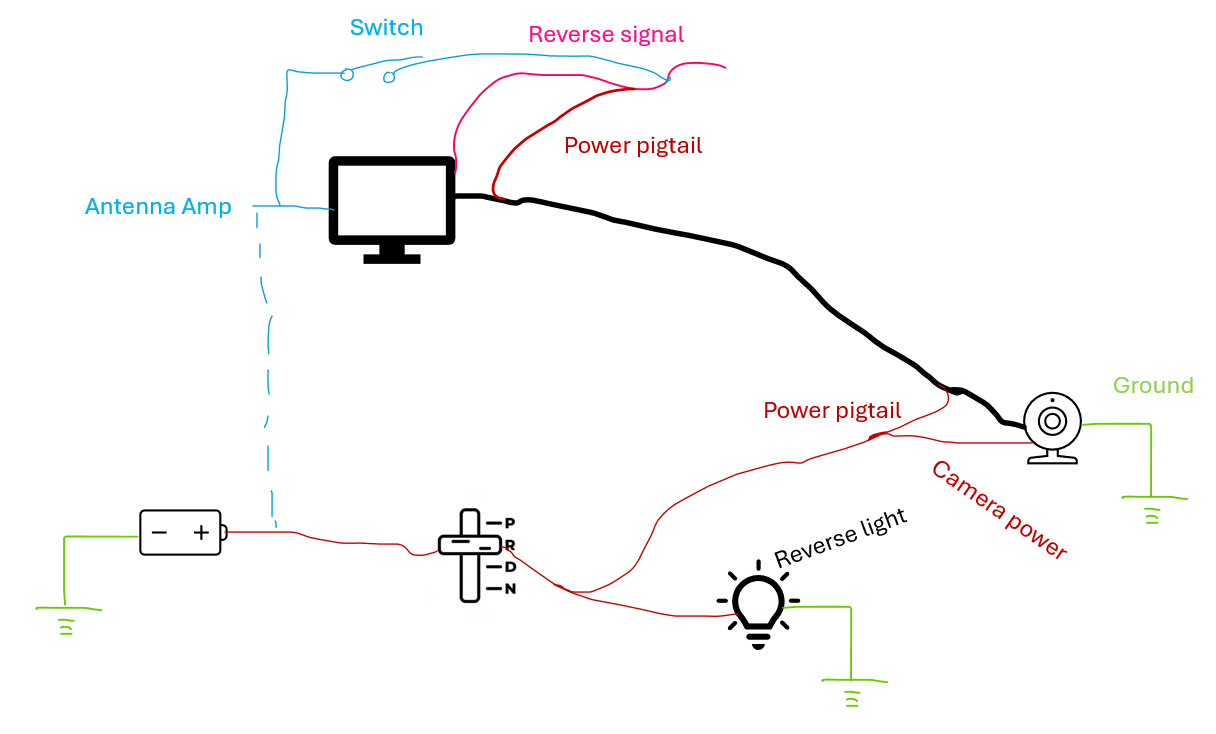
F. The Final Solution: The Diode Savior
To prevent electricity from back-feeding into the reverse lights, we use a diode. Think of a diode as a one-way valve for electricity. It allows current to flow from the reverse light to the camera, but blocks manual switch power from reaching the reverse lights.
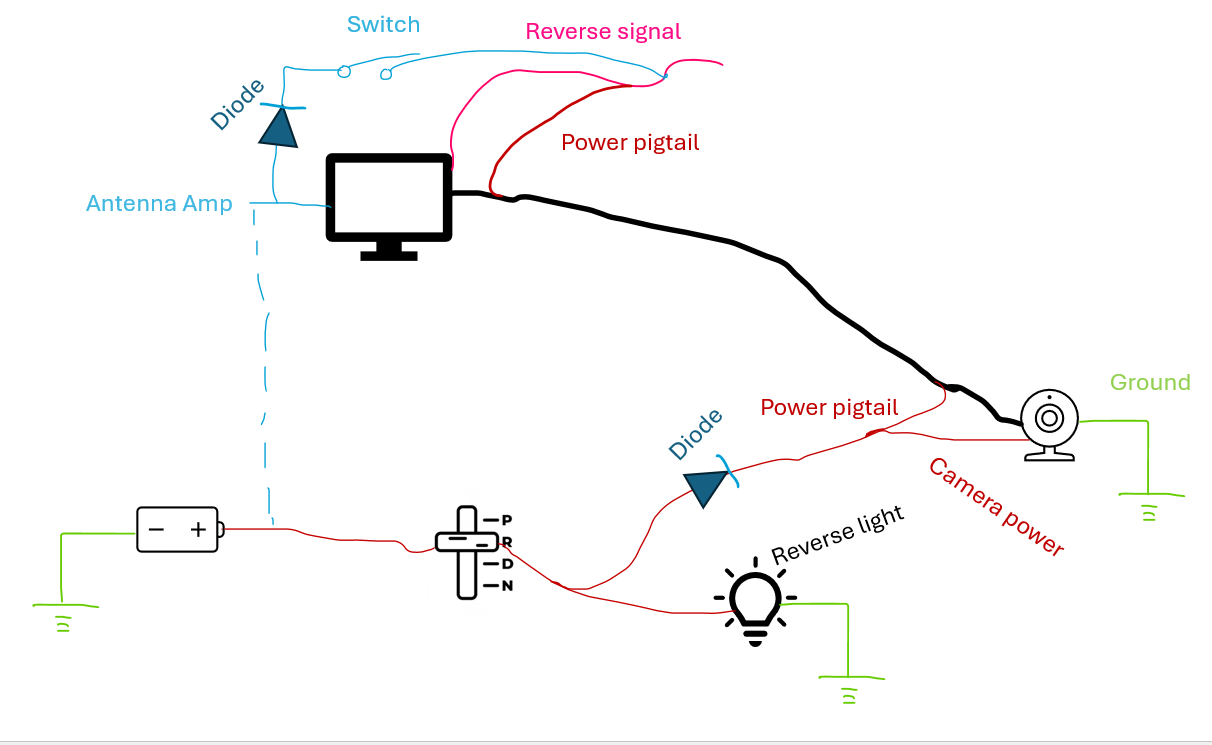
How this final setup behaves:
- In Reverse (R): Power flows through the diode to activate the system. Default OEM functionality is preserved.
- Manual Switch Closed: Power flows directly to the camera/head unit. The diode blocks that power from lighting up the reverse lights. Road safety is preserved.
I hope this technical breakdown helps you get more utility out of your head unit setup!
Enjoy your upgraded camera controls and stay safe out there!