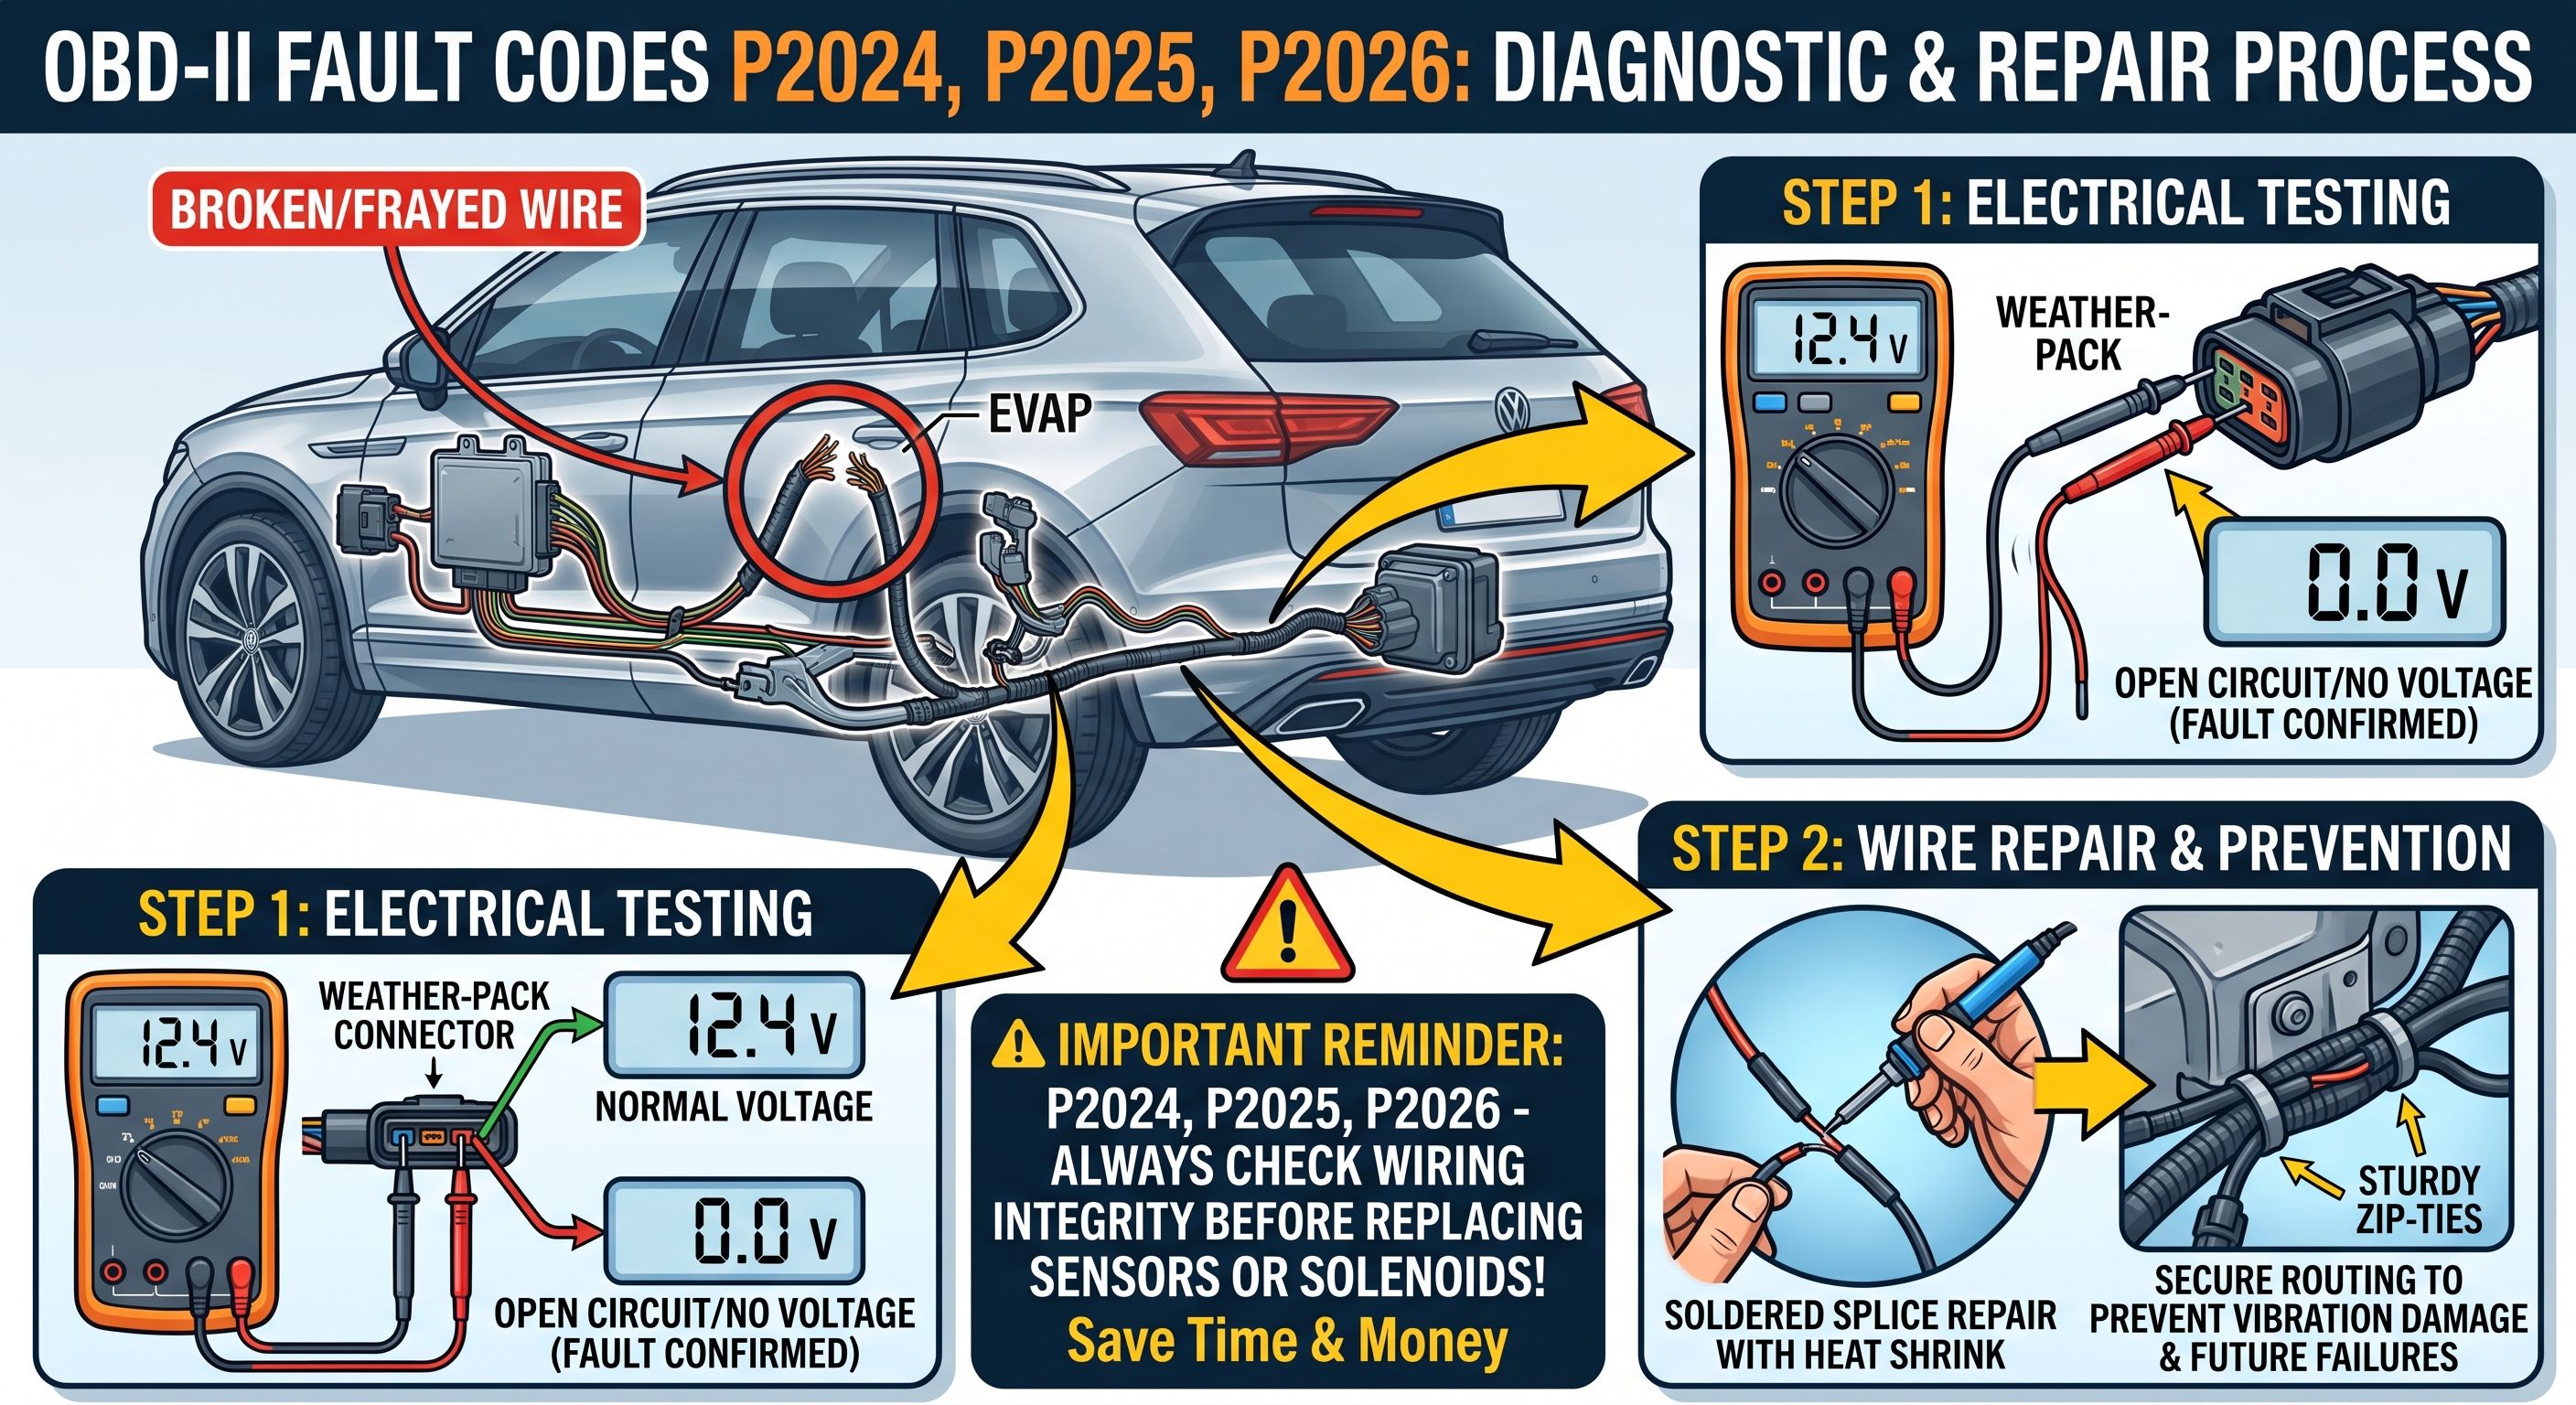
If your vehicle has triggered a check engine light with fault codes P2024, P2025, or P2026, do not rush out to buy a replacement part just yet. While OBD-II scanners point directly toward an EVAP system failure or temperature sensor issue, the actual root cause is very often an unseen broken wire in the harness.
In this guide, we break down what these codes mean and how to properly diagnose the wiring—which applies to all vehicle makes and models. In the second half of this guide, we cover specific Leak Detect Pump Control Module (often referred to as the EVAP temperature sensor module) locations, step-by-step procedures, and wiring repairs tailored specifically for VAG (Volkswagen Auto Group) vehicles (Audi, VW, Porsche, Lamborghini).
Understanding the Fault Codes
All three codes relate to the EVAP system temperature/pressure control circuit across any vehicle make:
- P2024: EVAP Fuel Vapor Temperature Sensor Circuit / Disconnected (Open Circuit)
- P2025: EVAP Fuel Vapor Temperature Sensor Performance / Intermittent Signal
- P2026: EVAP Fuel Vapor Temperature Sensor Circuit Low Voltage
Note: These codes generally do not affect engine performance or drivability—the car will drive completely fine. However, they will prevent your vehicle from passing emissions inspections until resolved.
Module Locations Across VAG Models
Because vehicles built on shared VAG platforms (like MLB Evo) utilize common structural layouts, performance variants such as the SQ7, RSQ8, and Lamborghini Urus share identical EVAP sensor placements with their standard counterparts:
| Vehicle Models | Module Location |
|---|---|
| Audi: Q7 / SQ7 (2007–2025+), Q8 / SQ8 / RS Q8 (2019–2025+) Porsche: Cayenne / Cayenne Coupé (2011–2025+) Lamborghini: Urus / Urus S / Urus Performante (2019–2025+) |
Mounted under the body, along the right side (passenger side) of the fuel tank. Accessible by lowering the underbody protective plastic shield directly in front of the rear right wheel. |
| Audi: Q5 / SQ5 (2009–2025+) Volkswagen: Atlas (2018–2025+), Touareg (2011–2024) Porsche: Macan (2015–2025+) |
Located inside the right rear wheel well behind the plastic fender liner, mounted near or directly on the EVAP Charcoal Canister assembly. |
| Audi: A4 / S4 / RS4 (2009–2024), A5 / S5 / RS5 (2008–2024), A6 / S6 / RS6 (2012–2024), A7 / S7 / RS7 (2012–2024) Volkswagen: Passat (2012–2022), Jetta (2011–2024), Golf / GTI / Golf R (2010–2024) |
Positioned under the vehicle near the EVAP Charcoal Canister assembly, adjacent to the right side of the gas tank under protective underbody belly pans. |
Step-by-Step Diagnostic & Repair Guide (VAG Vehicles)
- Locate the panel directly in front of the rear right (passenger-side) wheel.
- Remove the approximately six T25 Torx screws and two 10mm plastic nuts holding the underbody shield.
- Allow the shield to drop down to expose the fuel tank wall and the module mounted beside it. (You generally do not need to jack up large SUVs for this step).
Before ordering any replacement parts, test for power reaching the connector:
- Slide back the safety tab on the harness connector, press down, and disconnect it from the module.
- Set a digital multimeter to DC Volts.
- Locate the power feed pin (on an Audi Q7, this is typically a Red/White wire, located second from the left when facing the locking tab).
- Touch your positive probe to the power pin and the negative probe to a clean metallic ground point on the chassis.
Multimeter Diagnostic Values:
- ~12V Constant: Power delivery is normal. The sensor module itself may be faulty.
- 0V (P2024): Complete wire break or open circuit.
- Significantly lower than 12V e.g., 4V–7V (P2025/P2026): Frayed wire or high resistance in the circuit.
Because the wiring harness hangs under the chassis near suspension components, continuous vehicle vibration often causes metal fatigue inside the copper strands, breaking the conductor inside intact insulation.
Physical Inspection:
Feel along the wiring harness with your fingers if the break is not immediately visible. A snapped internal conductor will often feel soft, bulge slightly, or expose tiny wire strands piercing through the jacket.
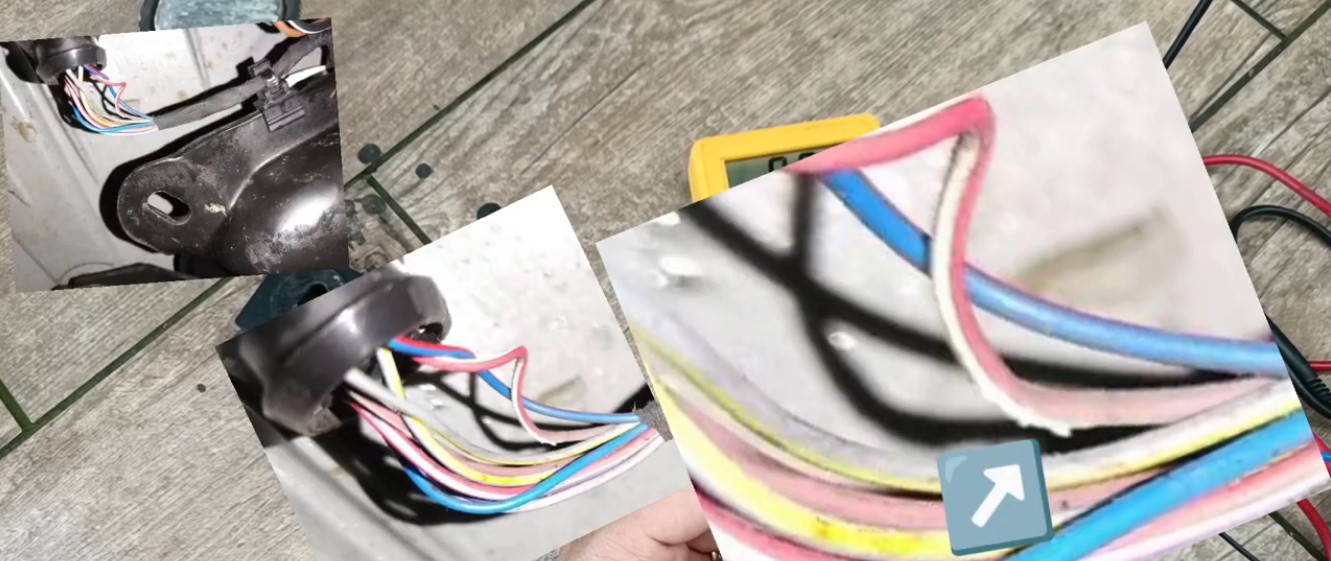
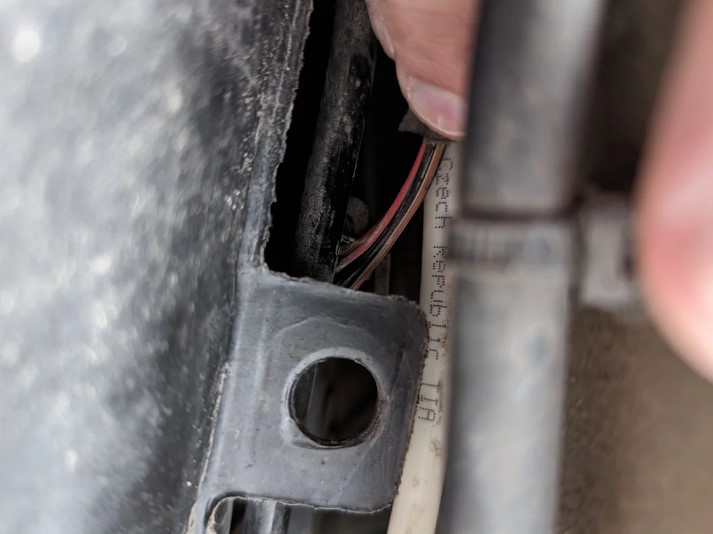
- The Fix: Cut out the damaged wire section, strip the ends back to clean copper, solder (or crimp using heat-shrink connectors) back together, and seal thoroughly with electrical tape or heat-shrink tubing.
- Vibration Prevention: Secure the repaired harness tightly to the vehicle frame using zip ties to eliminate excess movement and prevent future metal fatigue.
Replacement Parts & Tools
If you have verified power and determined that either the module or connector harness is physically damaged beyond repair, replacement components can be ordered directly below:
Leak Detect Pump Control Module
OEM/Replacement EVAP Sensor Module
EVAP Sensor Connector Harness
Replacement Wiring Plug Repair Kit